Multi-Camera Calibration Guide
MetriCal's multi-camera calibration is a joint process, which includes calibrating both intrinsics and extrinsics simultaneously. This guide provides specific tips for calibrating multiple cameras together.
Common Multi-Camera Workflows
MetriCal offers two approaches to multi-camera calibration: combined (all-at-once) and staged. The best approach depends on your specific hardware setup and calibration requirements.
Combined Calibration
If all your cameras can simultaneously view calibration targets, you can run a direct multi-camera calibration. This is the approach that we take in the example dataset below.
This approach works best when:
- You have a rig where all cameras can see the same target(s) at the same time
- You have good control over the target positioning
Staged Calibration
For large or complex camera rigs where:
- Cameras are mounted far apart
- Some cameras are in hard-to-reach positions
- It's difficult to have all cameras view targets simultaneously
A staged approach is recommended:
# First stages: Camera-only calibration
[stages.first-init]
command = "init"
dataset = "{{variables.camera-one-dataset}}"
...

[stages.first-calibration]
command = "calibrate"
dataset = "{{variables.camera-one-dataset}}"
input-plex = "{{first-init.initialized-plex}}"
...

# Second stages: Extrinsics calibration with
# referenced camera intrinsics from first stages
[stages.second-init]
command = "init"
dataset = "{{variables.camera-extrinsics-dataset}}"
# >>> Use camera cal from first stages <<<
reference-source = ["{{first-calibration.results}}"]
...

[stages.second-calibration]
command = "calibrate"
dataset = "{{variables.camera-extrinsics-dataset}}"
input-plex = "{{second-init.initialized-plex}}"
...
# This will now have all intrinsics + extrinsics
results = "{{auto}}"
This staged approach allows you to capture optimal data for each camera's intrinsics, getting close to each camera to fill its FOV, before moving on to extrinsics calibration. Using a staged approach, you can avoid the logistical challenges of trying to get optimal data for all cameras simultaneously.
For details on calibrating individual cameras, see the Single Camera Calibration guide.
Example Dataset and Manifest
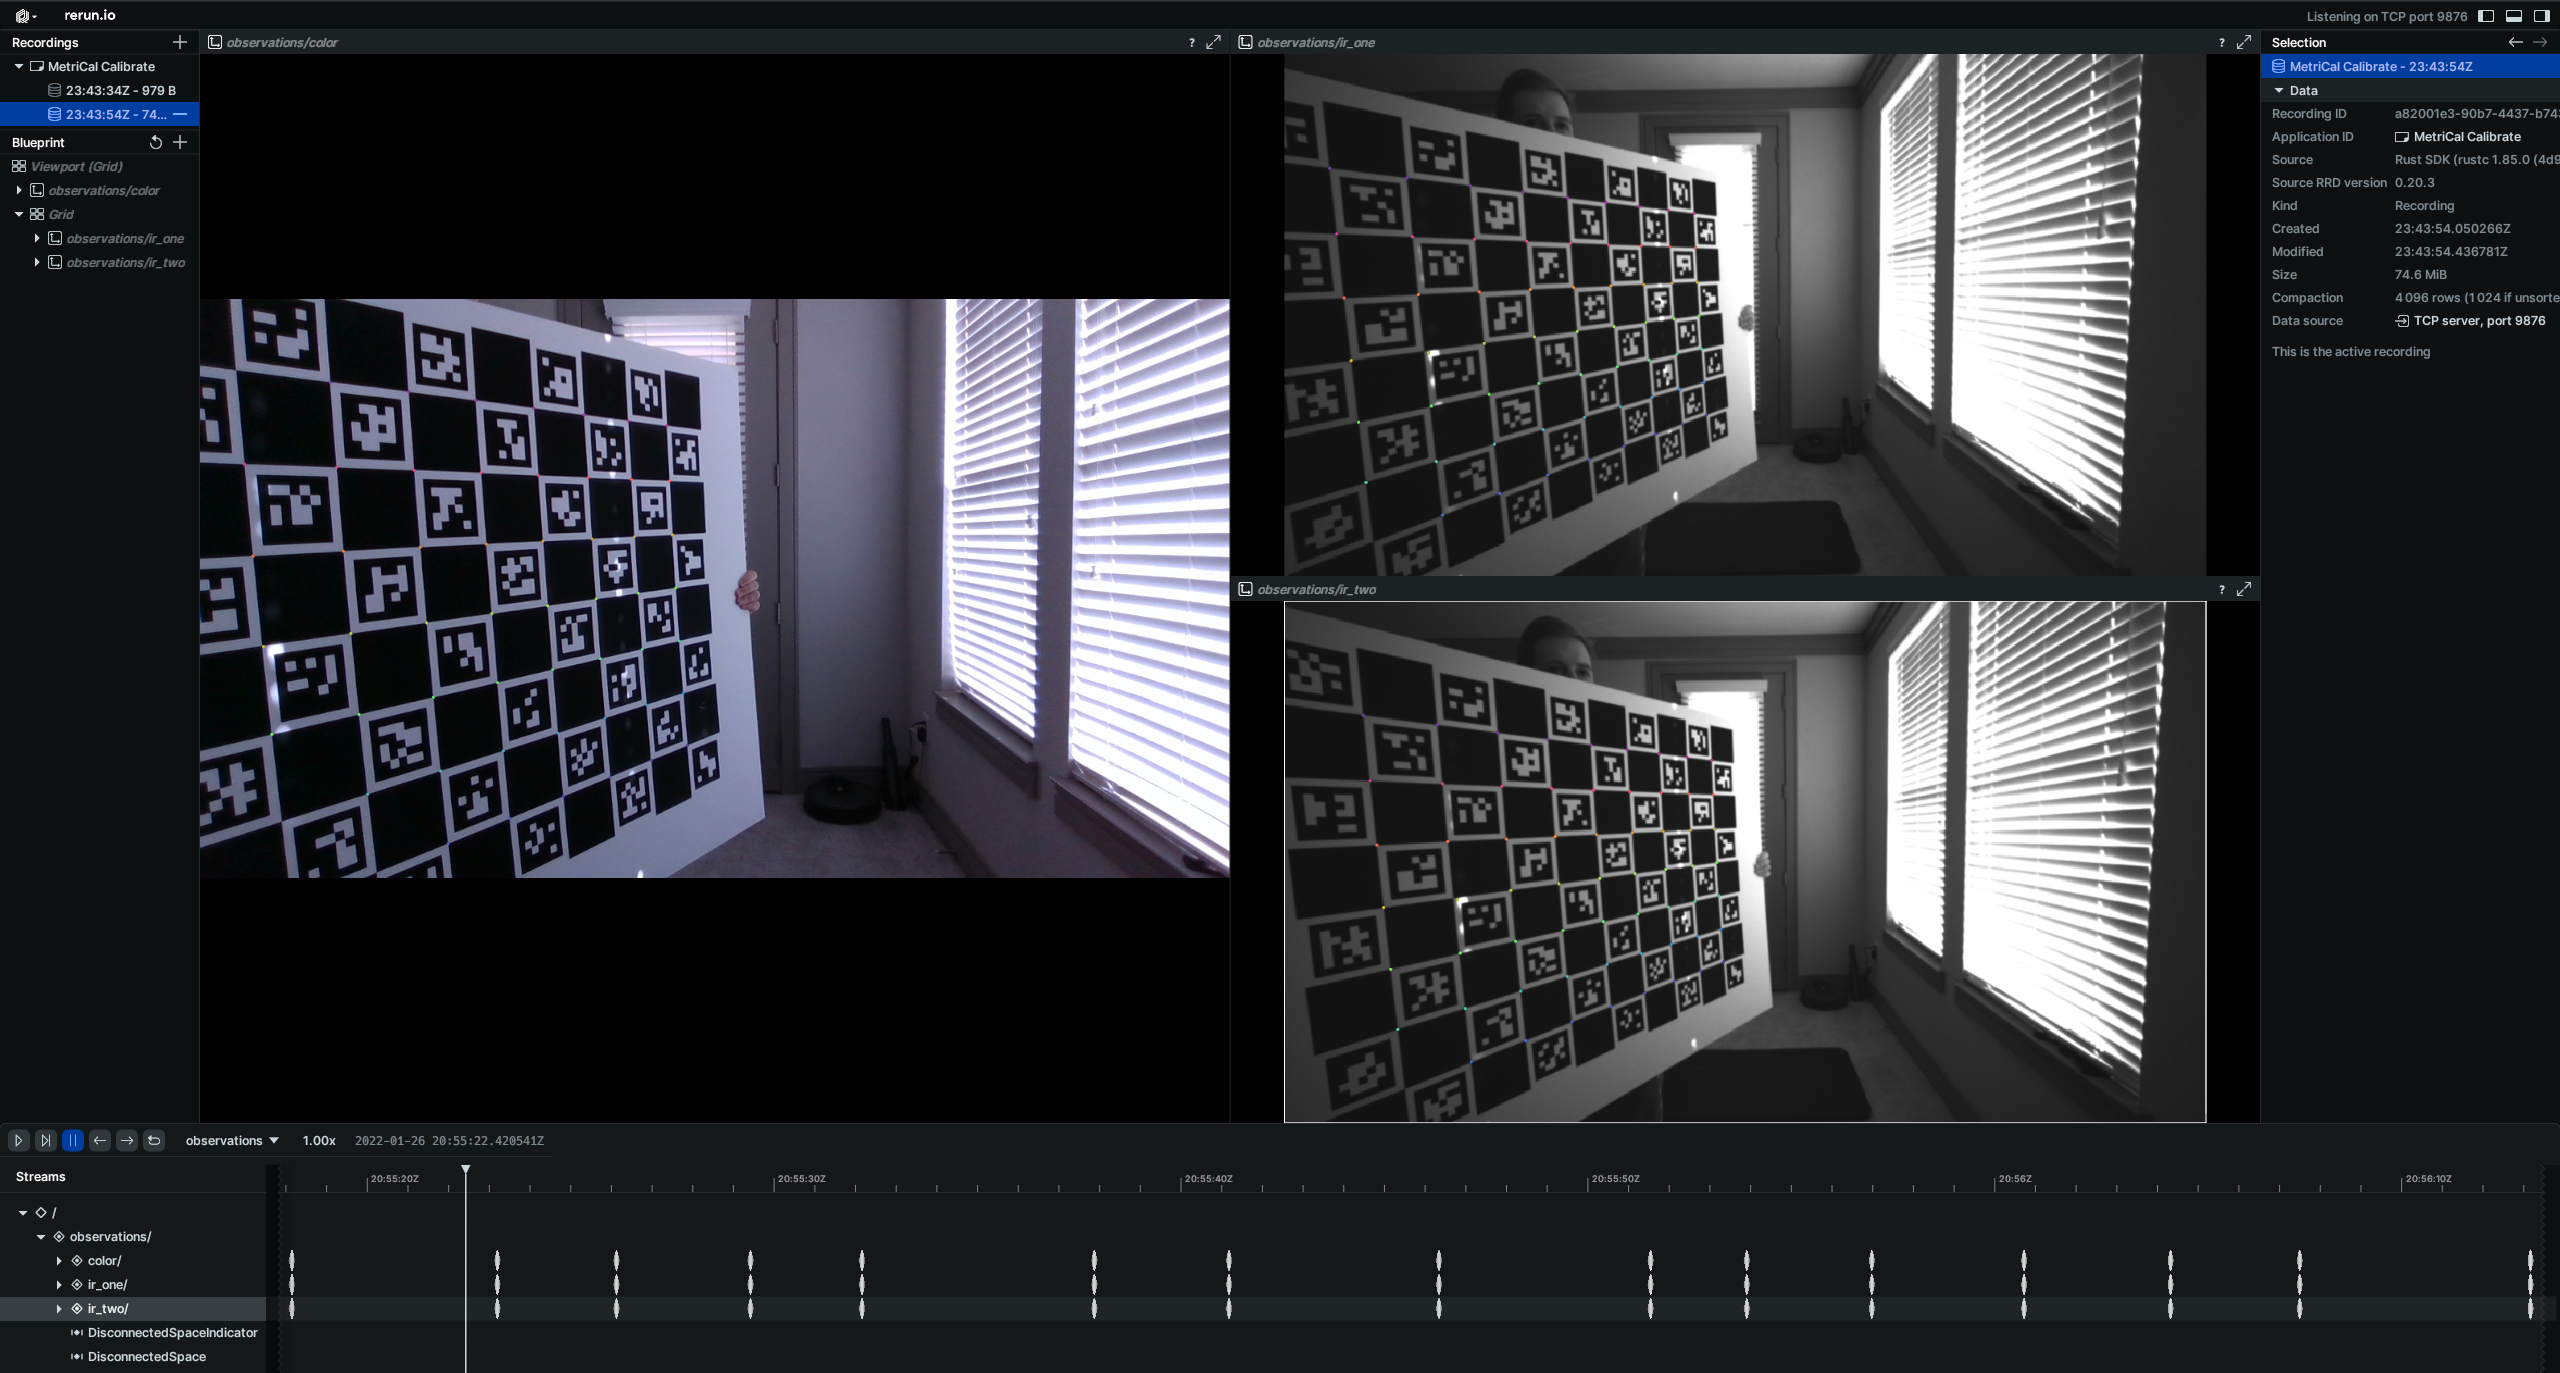
We've captured an example of a good multi-camera calibration dataset that you can use to test out MetriCal. If it's your first time performing a multi-camera calibration using MetriCal, it might be worth running through this dataset once just so that you can get a sense of what good data capture looks like.
This dataset features:
- Observations as a folder of folders
- Two infrared cameras
- One color camera
- One markerboard target
The Manifest
[project]
name = "MetriCal Demo: Multi-Camera Manifest"
version = "15.0.0"
description = "Manifest for running MetriCal on a camera dataset."
workspace = "metrical-results"

## === VARIABLES ===
[project.variables.dataset]
description = "Path to the input dataset containing camera and lidar data."
value = "camera_only_cortland_data/"

[project.variables.object-space]
description = "Path to the input object space JSON file."
value = "camera_only_cortland_objects.json"

## === STAGES ===
[stages.cam-init]
command = "init"
dataset = "{{variables.dataset}}"
topic-to-model = [
  ["09*", "no-distortion"],
  ["f7*", "no-distortion"],
  ["ff*", "opencv-radtan"]
]
overwrite-strategy = "replace"
... # ...more options...
initialized-plex = "{{auto}}"

[stages.cam-calibrate]
command = "calibrate"
dataset = "{{variables.dataset}}"
input-plex = "{{cam-init.initialized-plex}}"
input-object-space = "{{variables.object-space}}"
camera-motion-threshold = "disabled"
overwrite-detections = true
render = true
... # ...more options...
detections = "{{auto}}"
results = "{{auto}}"
Before running the manifest, let's take note of a couple things:
- Our overwrite strategy for our
cam-initstage is set toreplace, and we're also overwriting detections in thecam-calibratestage. If you go through the multi-camera calibration guide, which uses the same dataset, you'll see thatpreserve-ing your initialized plex will also keep prior detections. To be safe, we'll just do everything again. - Our second stage is rendered. This flag will allow us to watch the detection phase of the calibration as it happens in real time. This can have a large impact on performance, but is invaluable for debugging data quality issues.
MetriCal depends on Rerun for all of its rendering. As such, you'll need a specific version of Rerun
installed on your machine to use the --render flag. Please ensure that you've followed the
visualization configuration instructions before running this
manifest.
Running the Manifest
With a copy of the dataset downloaded and the manifest file created, you should be ready to roll:
metrical run camera_only_cortland_manifest.toml
While the calibration is running, take specific note of the target motion patterns, presence of still periods, and breadth of camera coverage. When it comes time to design a motion sequence for your own systems, try to apply any learnings you take from watching this capture.
When the run finishes, you'll be left with three artifacts:
initialized-plex.json: Our initialized plex from the first stage.report.html: a human-readable summary of the calibration run. Everything in the report is also logged to your console in realtime during the calibration. You can learn more about interpreting the report here.results.mcap: a file containing the final calibration and various other metrics. You can learn more about results here and about manipulating your results usingshapecommands here.
Data Capture Guidelines
Best Practices
| DO | DON'T |
|---|---|
| ✅ Ensure target is visible to multiple cameras simultaneously. | ❌ Calibrate each camera independently without overlap. |
| ✅ Maximize overlap between camera views. | ❌ Have overlap only at the peripheries of wide-angle lenses. |
| ✅ Keep targets in focus in all cameras. | ❌ Capture blurry or out-of-focus images in any camera. |
| ✅ Capture the target across the entire field of view for each camera. | ❌ Only place the target in a small part of each camera's field of view. |
| ✅ Rotate the target 90° for some captures. | ❌ Keep the target in only one orientation. |
| ✅ Capture the target from various angles to maximize convergence. | ❌ Only capture the target from similar angles. |
| ✅ Pause between poses to avoid motion blur. | ❌ Move the target continuously during capture. |
Maximize Overlap Between Images
While it's important to fill the full field-of-view of each individual camera to determine distortions, for multi-camera calibration, cameras must jointly observe the same object space to determine the relative extrinsics between them.
Once you've observed across the entire field-of-view of each camera individually, focus on capturing the object space in multiple cameras from the same position.
The location of this overlap is also important. For example, when working with very-wide field-of-view lenses, having overlap only at the peripheries can sometimes produce odd results, because the overlap is largely contained in high distortion areas of the image. Aim for overlap in varying regions of the cameras' fields of view.
Using Multiple Targets
When working with multiple cameras, using multiple calibration targets can be particularly beneficial. This provides:
- Better depth variation, which helps reduce projective compensation
- More opportunities for overlap between cameras with different fields of view or orientations
- Improved extrinsics estimation between cameras
Read more about using multiple targets here.
Basic Camera Calibration Principles
All of the principles that apply to single camera calibration also apply to each camera in a multi-camera setup:
Keep Targets in Focus
Ensure all cameras in your system are focused properly. A lens focused at infinity is recommended for calibration. Knowing the depth of field for each camera helps ensure you never get blurry images in your data.
Consider Target Orientations
Collect data where the target is captured at both 0° and 90° orientations to de-correlate errors in x and y measurements. This applies to all cameras in your multi-camera setup.
Fill the Full Field of View
For each camera in your setup, ensure you capture the target across the entire field of view, especially near the edges where distortion is greatest.
Maximize Convergence Angles
The convergence angle of each camera's pose relative to the object space is important. Aim for convergence angles of 70° or greater when possible.
Troubleshooting
If you encounter errors during calibration, please refer to our Errors and Troubleshooting documentation.
Remember that all measurements for your targets should be in meters, and you should ensure visibility of as much of the target as possible when collecting data.