Single Camera Calibration Guide
MetriCal's camera calibration is a joint process, which includes calibrating intrinsics and extrinsics at the same time. This guide provides tips and best practices specifically for single camera calibration.
Videos: Camera Calibration Basics
If you haven't already, we suggest checking out our video on camera calibration basics, which covers the underlying principles of how MetriCal performs camera calibrations, as well as best practices for data capture.
Camera Calibration Basics
Single Camera Data Collection
Common Single Camera Workflows
Seeding Larger Calibrations
Single camera intrinsics calibration is often the first step in a multi-stage calibration process. When dealing with complex rigs where cameras are mounted in hard-to-reach positions (e.g., several feet off the ground), it can be beneficial to:
- Calibrate each camera's intrinsics individually using optimal data for that camera
- Use these individual calibrations to seed a larger multi-camera or sensor fusion calibration
This approach allows you to get up close to each camera individually to fully cover its field of view, which might not be possible when capturing data for the entire rig simultaneously.
The resulting calibration file from this process can be used as input to subsequent calibrations by passing it as the input plex to a plex learn stage:
[stages.first-calibration]
command = "calibrate"
dataset = "{{variables.single-cam-dataset}}"
input-plex = "{{first-learn.output-plex}}"
...

[stages.second-learn]
command = "plex-learn"
dataset = "{{variables.second-dataset}}"
# Use camera cal from first stages
input-plex = "{{first-calibration.results}}"
...

[stages.second-calibration]
command = "calibrate"
# Skip the intrinsics search, since we have good seed values
skip-intrinsics-search = true
...
See the Multi-Camera Calibration guide for details on how to combine multiple single-camera calibrations.
Example Dataset and Manifest
We've captured an example of a good single camera calibration dataset that you can use to test out MetriCal. If it's your first time performing a single camera calibration using MetriCal, it might be worth running through this dataset once just so that you can get a sense of what good data capture looks like.
This dataset features:
- Observations as a folder of folders
- Two infrared cameras
- One color camera
- One markerboard target
The Manifest
[project]
name = "MetriCal Demo: Single Camera Manifest"
metrical-version = "18.0.2"
version = "0.1.0"
description = "Manifest for running MetriCal on a camera dataset."
workspace = "metrical-results"

[project.variables.dataset]
description = "Path to the input dataset containing camera data."
value = "camera_only_cortland_data/"

[project.variables.object-space]
description = "Path to the input object space JSON file."
value = "camera_only_cortland_objects.json"

[stages.cam-new]
command = "plex-new"
output-plex = "{{auto}}"

[stages.cam-learn]
command = "plex-learn"
input-plex = "{{cam-new.output-plex}}"
dataset = "{{variables.dataset}}"
topic-to-model = [["09*", "no-distortion"]]
output-plex = "{{auto}}"

[stages.cam-calibrate]
command = "calibrate"
dataset = "{{variables.dataset}}"
input-plex = "{{cam-learn.output-plex}}"
input-object-space = "{{variables.object-space}}"
optimization-profile = "standard"
camera-motion-threshold = "disabled"
lidar-motion-threshold = "disabled"
preserve-input-constraints = false
disable-ore-inference = false
overwrite-detections = true
override-diagnostics = true
show-results = false
time-sync = true
render = false
detections = "{{auto}}"
results = "{{auto}}"
We're overwriting detections in the cam-calibrate stage. If you go through the
multi-camera calibration guide, which uses the same dataset, you'll want to
make sure you don't accidentally carry over stale detections from a previous run.
Running the Manifest
With a copy of the dataset downloaded and the manifest file created, you should be ready to roll:
metrical run camera_only_cortland_manifest_single_cam.toml

While the calibration is running, you can set render = true and see what's going on. Take specific
note of the target motion patterns, presence of still periods, and breadth of camera coverage. When
it comes time to design a motion sequence for your own systems, try to apply any learnings you take
from watching this capture.
When the run finishes, you'll be left with three artifacts:
output-plex.json: The learned plex from the first stage.report.html: a human-readable summary of the calibration run. Everything in the report is also logged to your console in realtime during the calibration. You can learn more about interpreting the report here.results.mcap: a file containing the final calibration and various other metrics. You can learn more about results here and about manipulating your results usingshapecommands here.
Data Capture Guidelines
Best Practices
| DO | DON'T |
|---|---|
| ✅ Keep targets in focus - use a lens focused at infinity when possible. | ❌ Capture blurry or out-of-focus images. |
| ✅ Capture the target across the entire field of view, especially near the edges. | ❌ Only place the target in a small part of the field of view. |
| ✅ Rotate the target 90° for some captures (or rotate the camera if target is fixed). | ❌ Keep the target in only one orientation. |
| ✅ Capture the target from various angles to maximize convergence (aim for 70° or greater). | ❌ Only capture the target from similar angles. |
| ✅ Make the target appear as large as possible in the image. | ❌ Keep the target too far away from the camera. |
| ✅ Pause between poses to avoid motion blur. | ❌ Move the target or camera continuously during capture. |
Keep Targets in Focus
This tip is an absolute must when capturing data with cameras. Data that is captured out-of-focus breaks underlying assumptions that are made about the relationship between the image projection and object space; this, in turn, breaks the projection model entirely!
A lens focused at infinity captures objects far away with ease without defocusing, so this is the recommended setting for calibration. Care should be taken, therefore, not to get a target too close to a lens that it blurs out the image. This near-to-far range in which objects are still focused is called a camera's depth of field. Knowing your depth of field can ensure you never get a blurry image in your data.
It should be noted that a lens with a shorter focal length, i.e. wide field of view, tends to stay in focus over larger depths of field.
Consider Your Target Orientations
One of the largest sources of projective compensation comes from and correlations in the image space observations. All of these effects are especially noticeable when there is little to no depth variation in the target field.
It is almost always helpful to collect data where the target field is collected at 0° and 90° orientations:
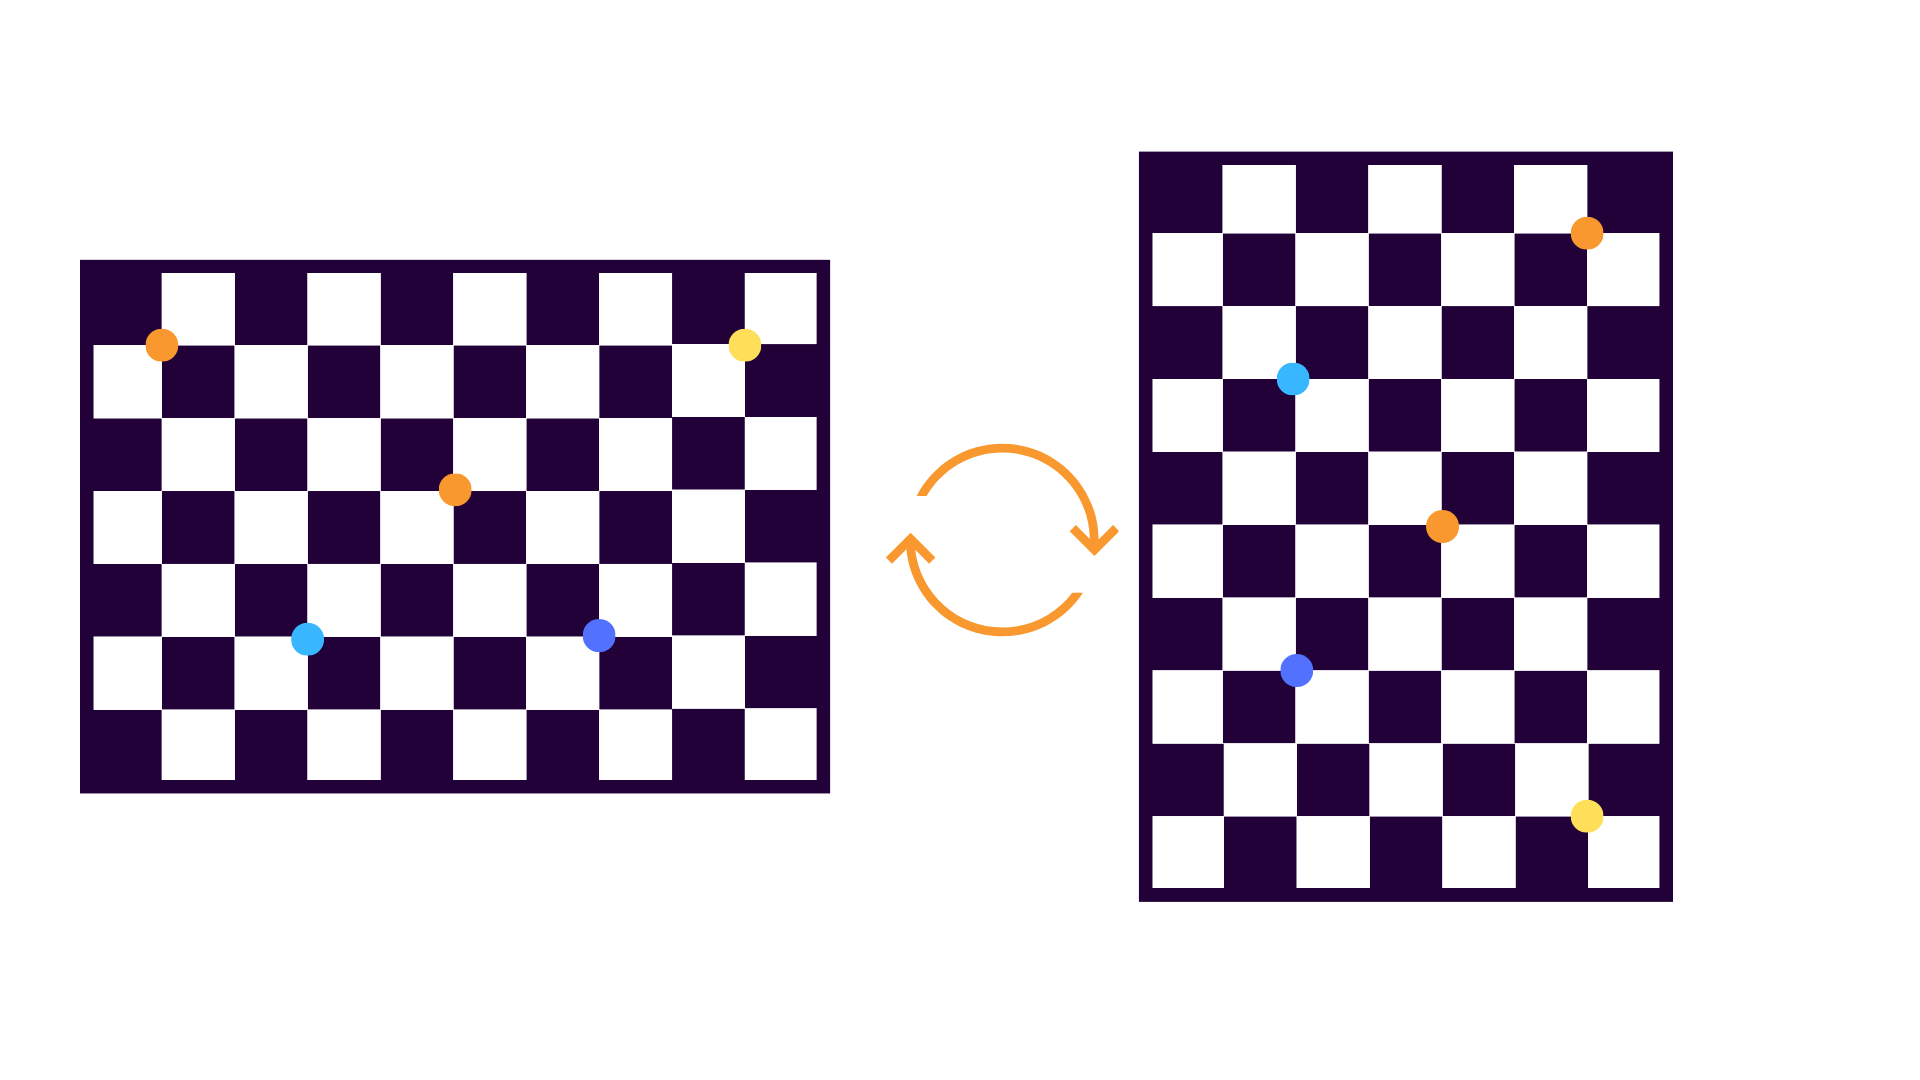
When the object space is captured at 0°:
- image measurements directly measure in object space
- image measurements directly measure in object space
When the object space is captured at 90°:
- image measurements directly measure in object space
- image measurements directly measure in object space
This process de-correlates errors in and , because small errors in the and image measurements are statistically independent. There is no need to collect more data beyond 0° and 90° rotations; the two orientations alone do enough.
Note that the same trick can be applied if the target is static, and the camera is rotated relative to the targets instead.
Consider the Full Field Of View
The bigger the target is in the image, the better.
A common data capture mistake is to only place the target in a small part of the field of view of the camera. This makes it extremely difficult to model radial distortions, especially if the majority of the data is in the center of the extent of the image. To mitigate this, object points should be observed across as much of the camera's field of view as is possible.
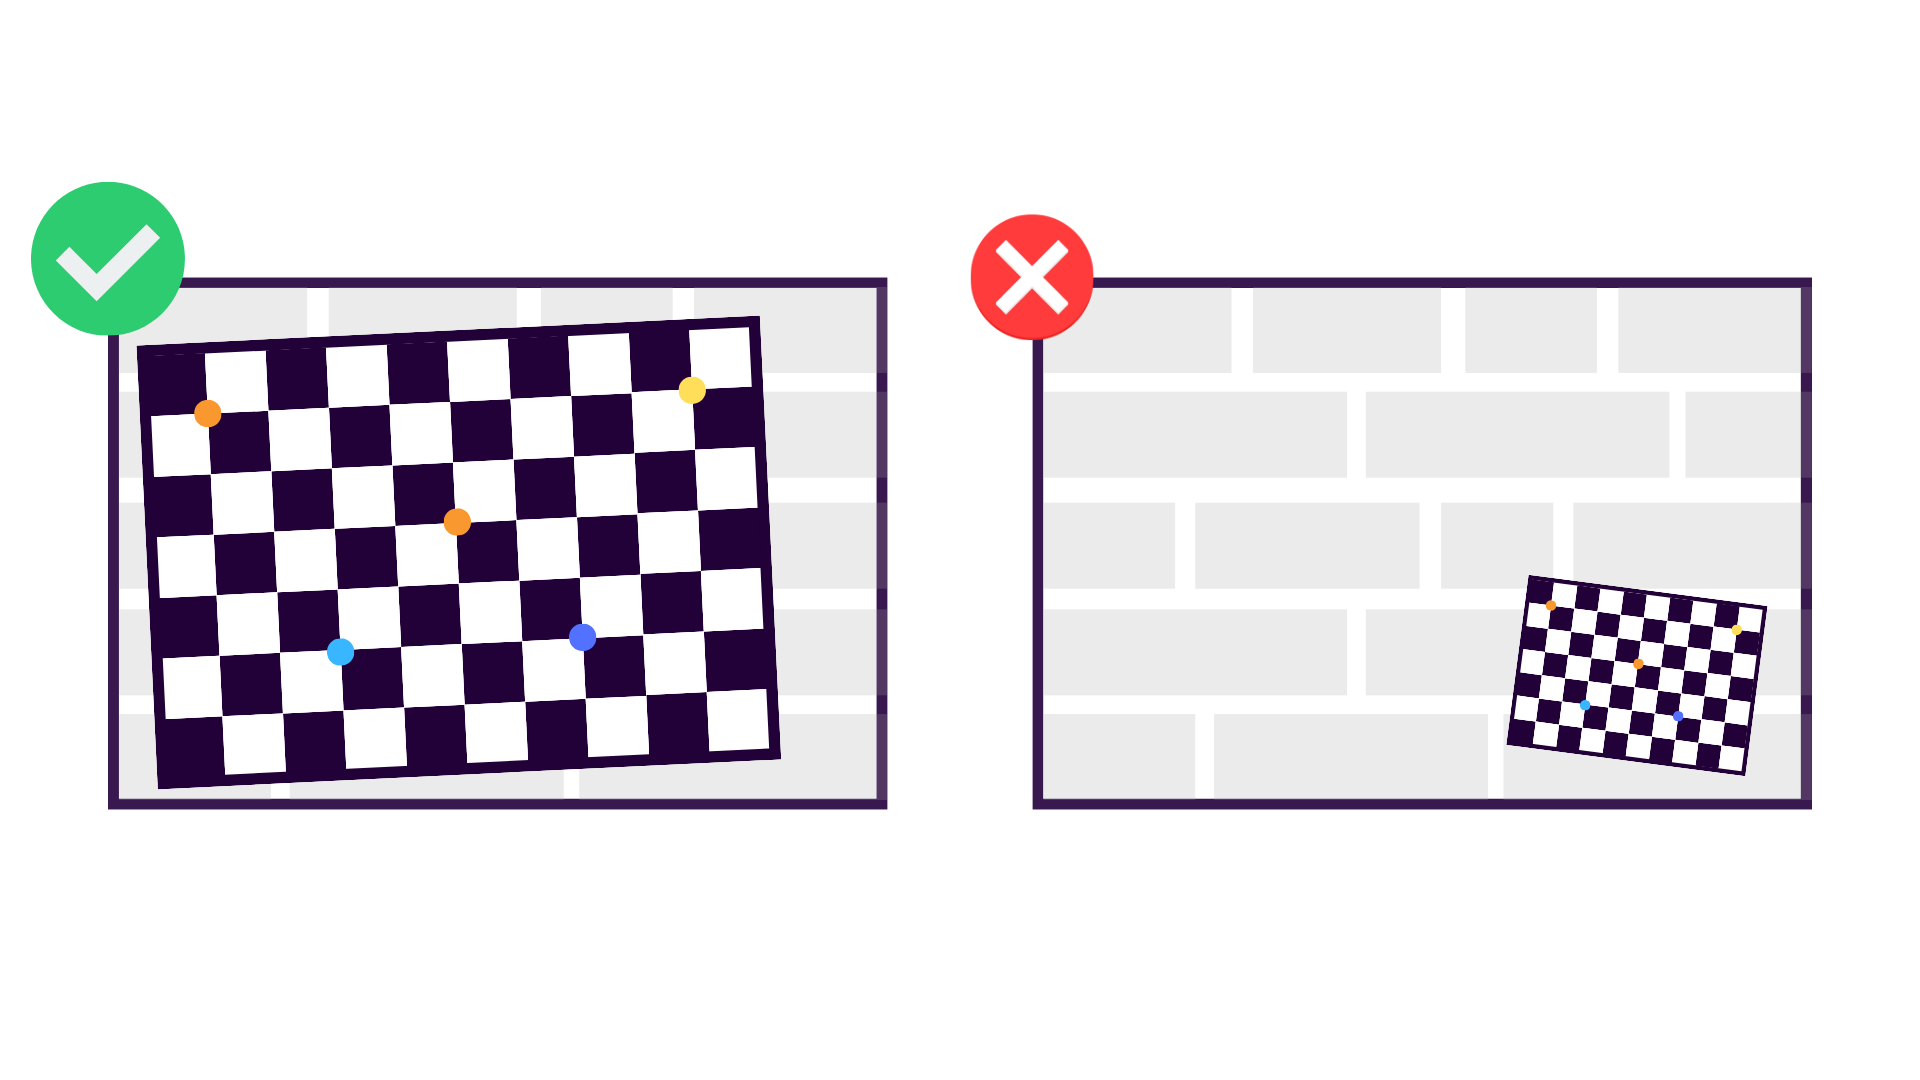
It is especially important to get image observations with targets near the periphery of the image, because this where distortion is the greatest, and where it needs to be characterized the best.
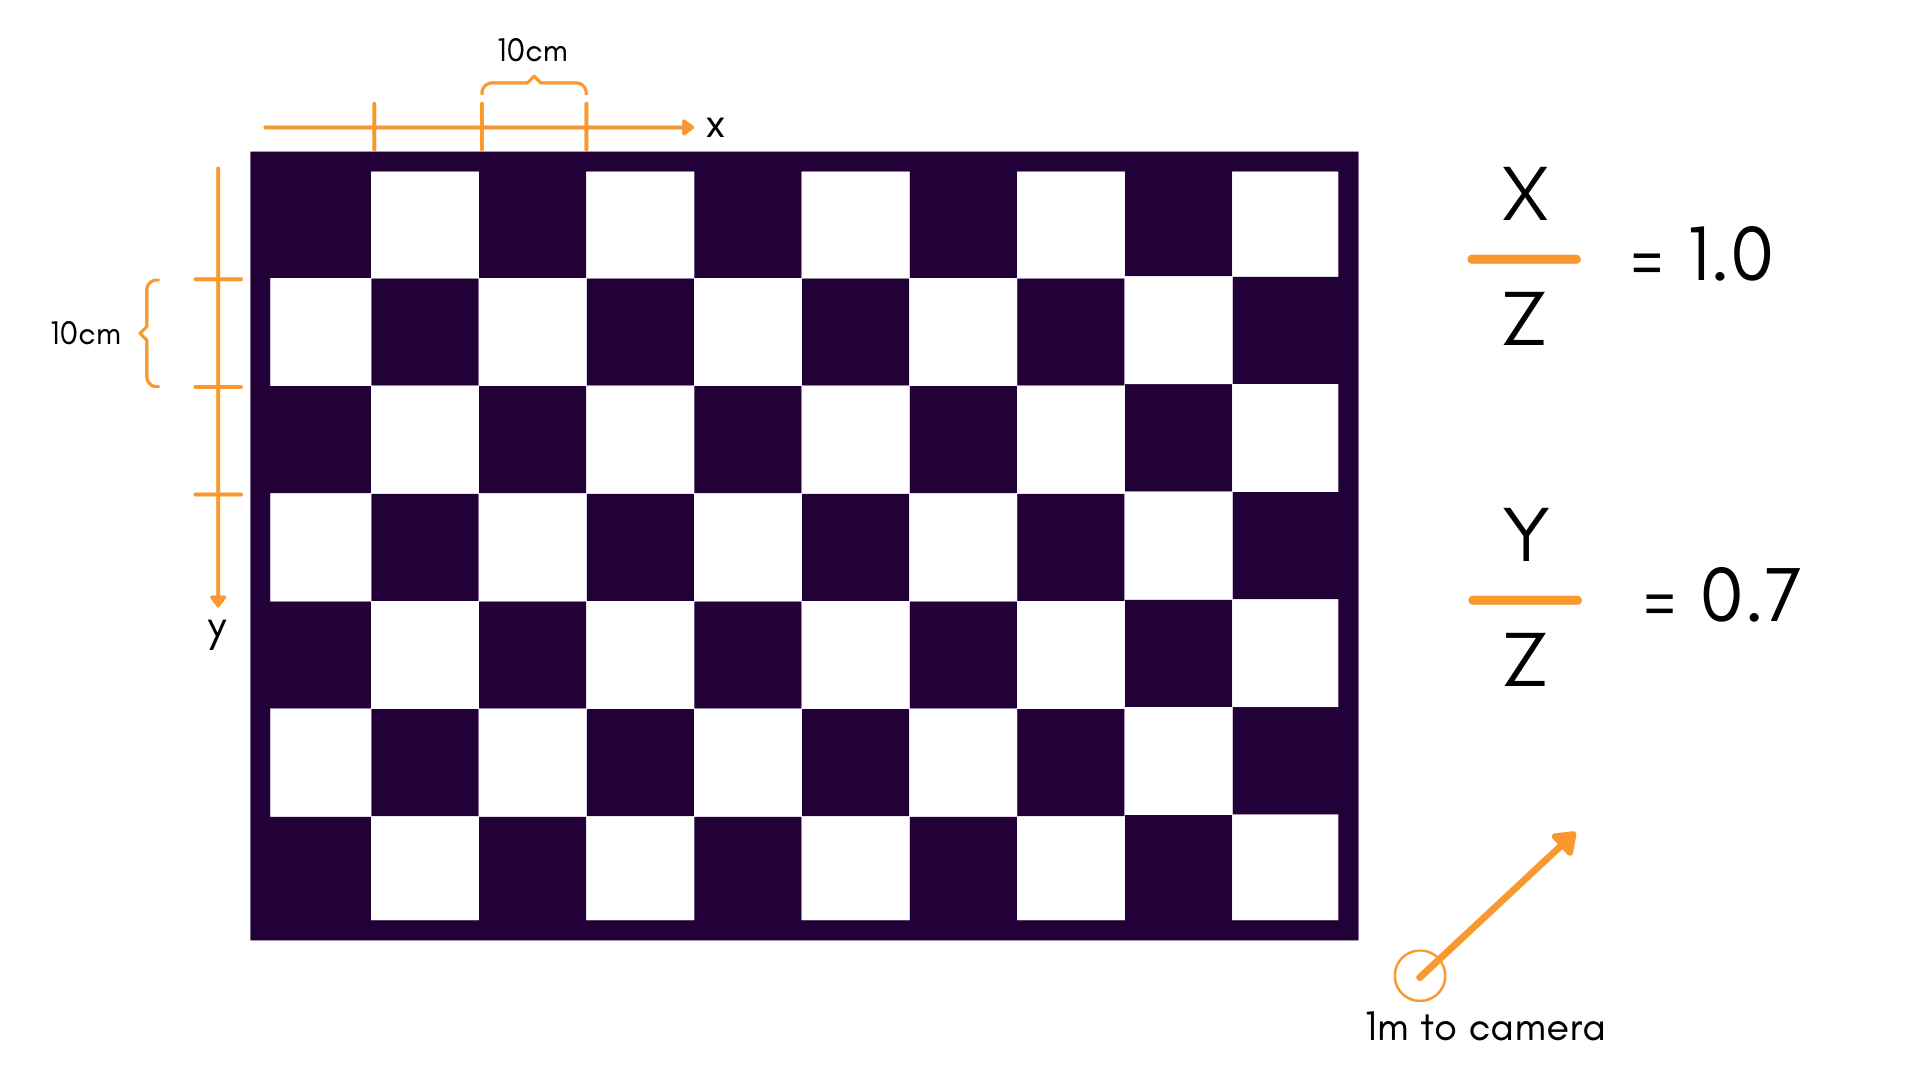
As a good rule-of-thumb, a ratio of about 1:1 is good for the target width () compared to the distance to the target (). For a standard 10×7 checkerboard, this would mean:
- 10 squares in the -direction, each of length 0.10m
- 7 squares in the -direction of length 0.10m
- Held 1m away from the camera during data collection
This gives a ratio of 1:1 in , and 7:10 in .
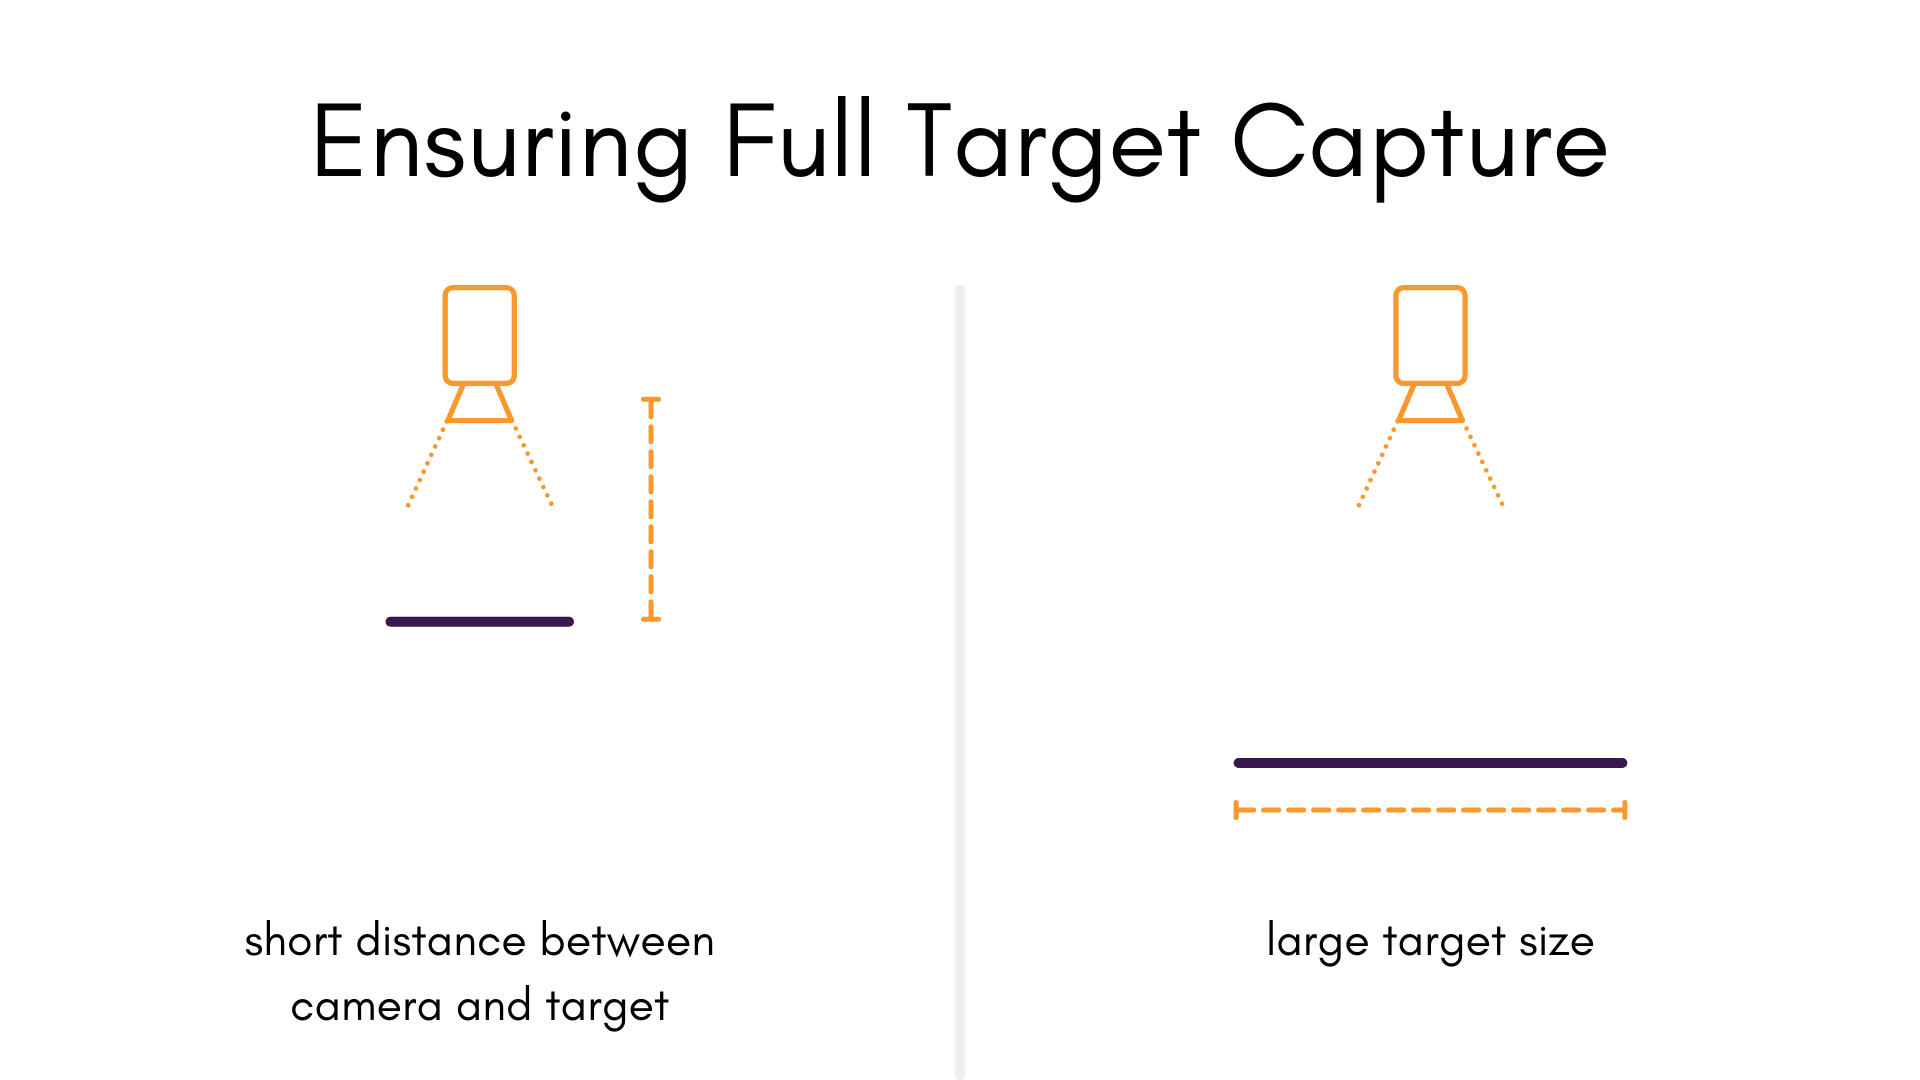
In general, increasing the size of the target field is preferred to moving too close to the camera (see "Keep Targets In Focus" above). However, both can be useful in practice.
Maximize the Convergence Angle
The convergence angle of the camera's pose relative to the object space is a major factor in the determination of our focal length , among other parameters. The more the angle changes in a single dataset, the better; In most scenarios, reaching a convergence angle of 70° or greater is recommended.
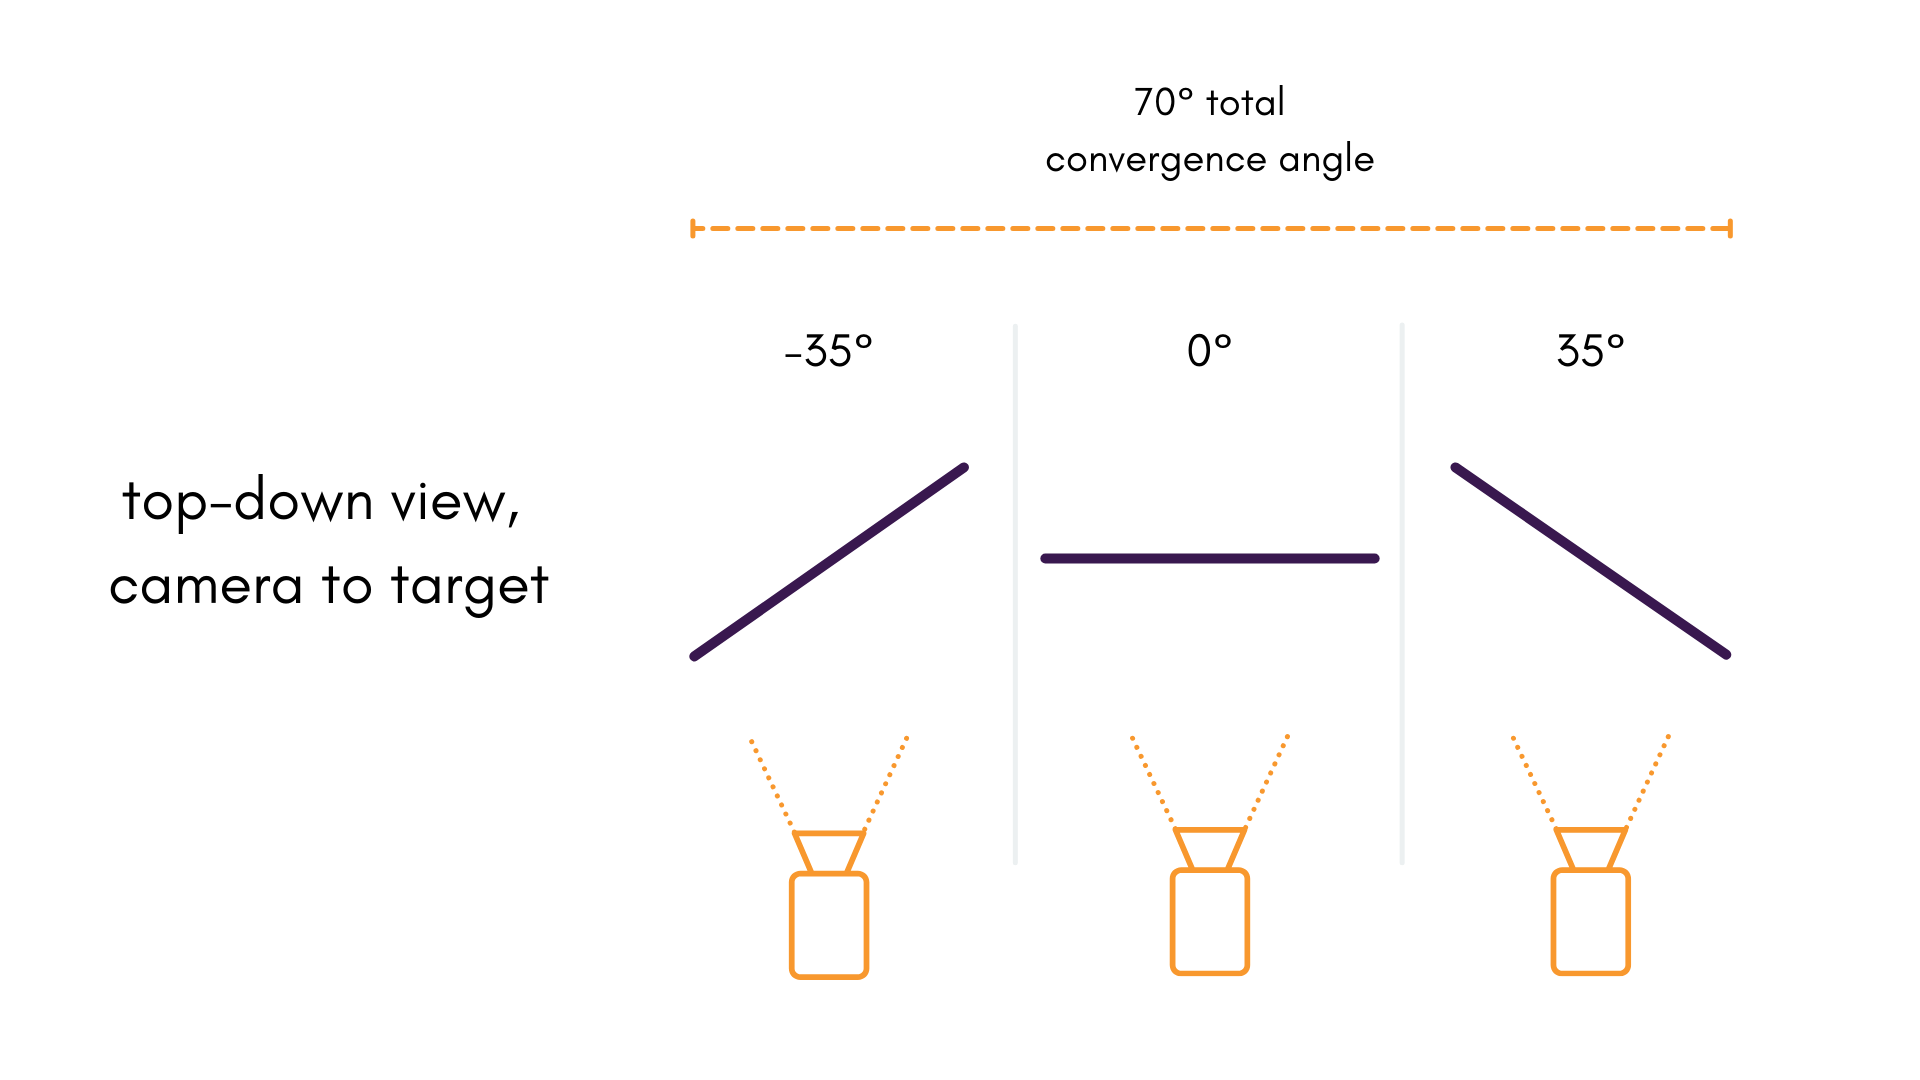
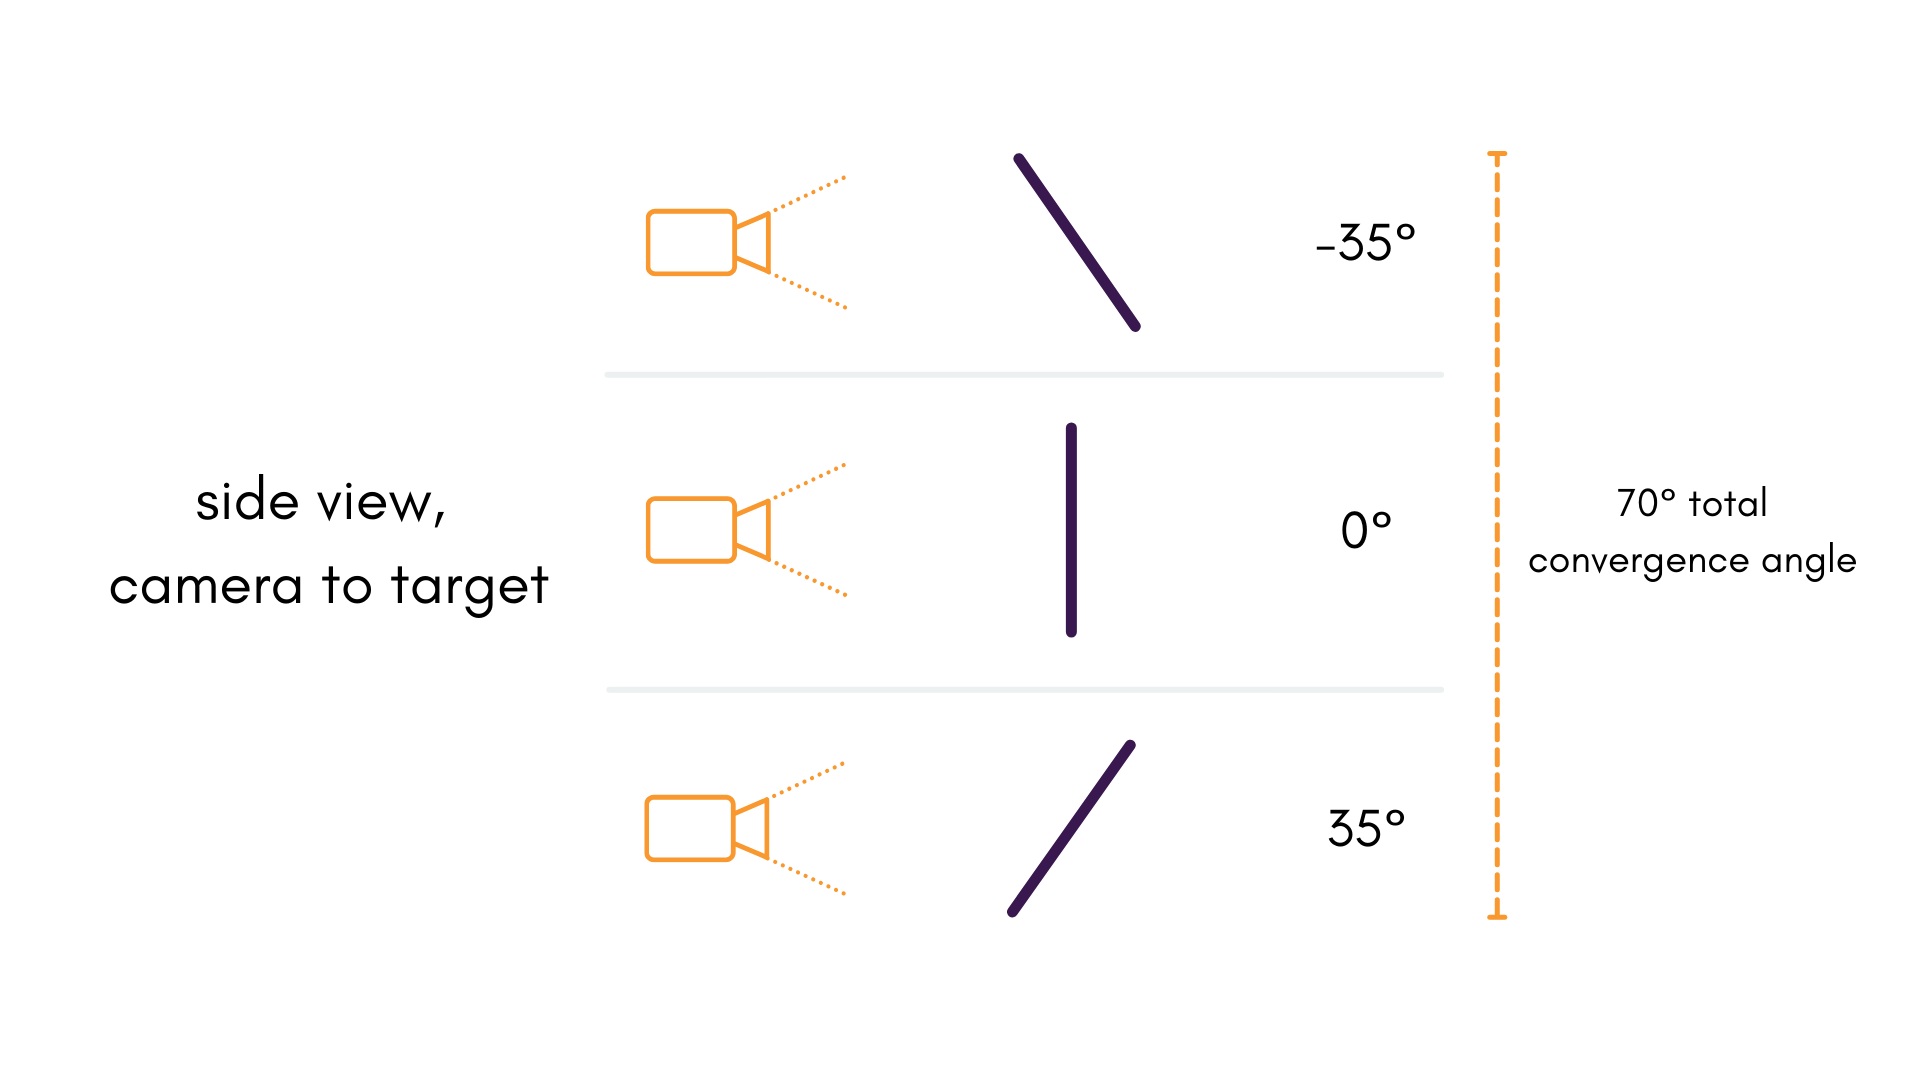
It is worth noting that other data qualities shouldn't be sacrificed for better angles. It is still important for the image to be in focus and for the targets to be observable.
Advanced Considerations
The Importance of Depth Variation
This point is more of a consideration than a requirement. At the very least, it should serve to provide you with more intuition about the calibration data capture process.
Using a single, flat planar target provides very little variation in object space depth . Restricting object space to a single plane introduces projective compensation in all sorts of ways:
- to all object space coordinates
- and to both and extrinsic rotations about and (for Brown-Conrady)
- to through (for Kannala-Brandt)
A non-planar target, or a combination of targets using multiple object spaces helps to mitigate this effect by adding depth variation in . In general, more depth variation is better.
For those with only a single, planar calibration targets — know that MetriCal can still give great calibration results given the other data capture guidelines are followed.
Troubleshooting
If you encounter errors during calibration, please refer to our Errors and Troubleshooting documentation.
Remember that all measurements for your targets should be in meters, and you should ensure visibility of as much of the target as possible when collecting data.